Add a Comic
Create a project
Section titled “Create a project”- Open the library and select New Comic.
- Enter a name. It is used for display and as the file name for exports, so characters that your platform does not allow are not supported.
- Choose the source and target languages.
- Select Create.
The app creates a default volume and chapter. You can rename the project and add more volumes or chapters later.
Import comic pages
Section titled “Import comic pages”Open a project, open the target chapter, and choose Add Images. Imported images are saved in the app’s local data.
Before importing, confirm that you are adding images to the intended volume and chapter, so that you do not overwrite a chapter that already has images.
Manage and switch volumes and chapters
Section titled “Manage and switch volumes and chapters”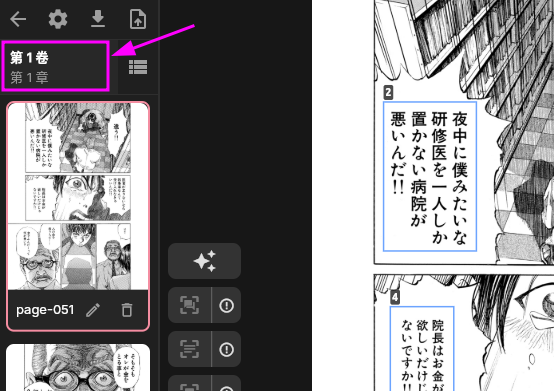
Select the marked spot in the image to open the chapter manager. There you can create/rename volumes and chapters, or delete them. Deleting a volume or chapter also deletes its pages, text blocks, translations, and proofreading results. Read the counts in the confirmation dialog before confirming.
The manager sorts volumes and chapters by their names, which also affects the page order in the reader. The reader displays content in volume, chapter, and image order.
You can also click a chapter name to open that chapter and start translating.
Comic settings
Section titled “Comic settings”Comic settings include:
- comic name and translated name;
- source and target language;
- default text orientation (horizontal or vertical);
- default reading direction for horizontal and vertical text;
- whether to ignore OCR-provided orientation and reading direction;
- the number of context pages before and after the current page;
- whether context may cross chapter or volume boundaries;
- glossaries attached to this comic.
These settings apply only to the current comic.
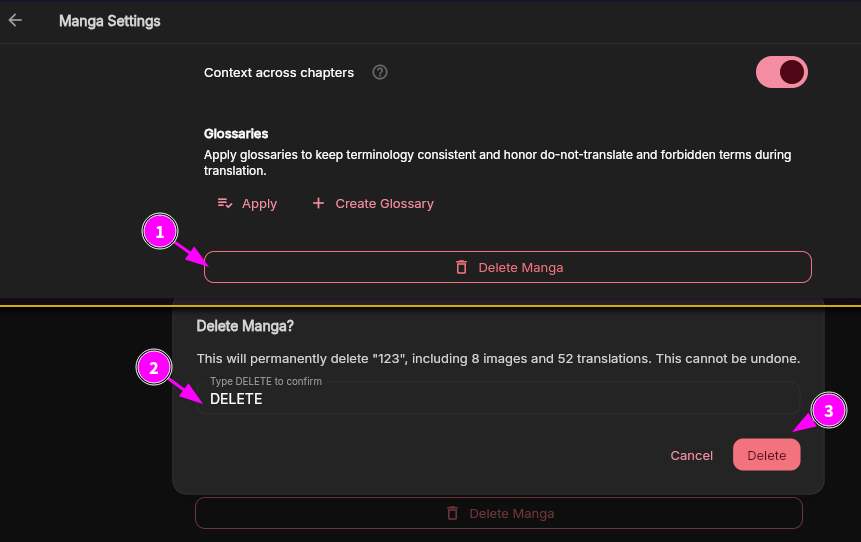
Delete a comic
Section titled “Delete a comic”Deleting a comic cannot be undone. It removes the related volumes, chapters, images, text blocks, source text, and translations. Export anything you need before deleting it.